
Roof Flashing’s Biggest Mistake: Caulk Where Metal Belongs
The #1 roof flashing mistake starts with a misunderstanding. Roof flashing is the thin metal that seals every place your roof meets something else: a chimney, a wall, a valley, a vent, a skylight. When a ceiling stain shows up, most homeowners blame the shingles. More often, the water came in at one of those joints.
Those joints are where the #1 roof flashing mistake happens, and it’s the most expensive one in residential roofing. This guide shows what it is, where to find every piece of roof flashing on your house, how each one fails, and the questions that keep it from happening on your next roof.
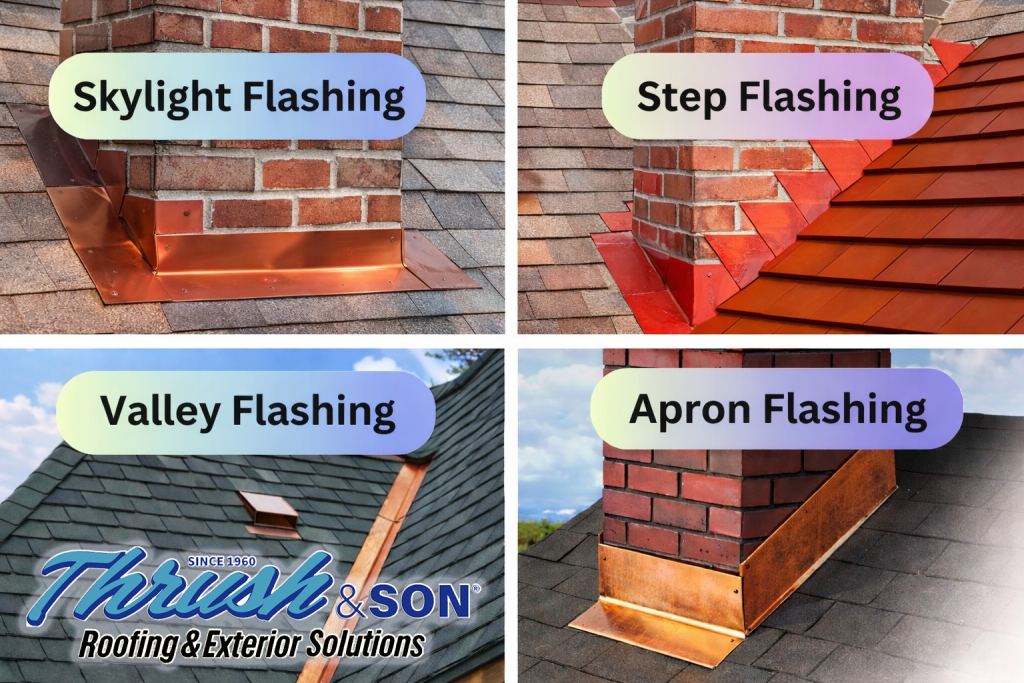
The #1 roof flashing mistake: treating flashing as an afterthought, reusing tired metal or smearing sealant over a joint, and trusting caulk to do a job only layered metal can do.
Why Caulk Fails and Metal Lasts
Good roof flashing works like shingles do: each piece overlaps the one below it, so gravity carries water down and out. Sealant tries to stop water with a seal instead, and every seal on a roof eventually breaks. Swapping one for the other is the #1 roof flashing mistake.
Sealant as the defense
- Old step flashing left in place and shingled around
- Counterflashing glued to the brick face of a chimney
- A cracked pipe boot covered in roof cement
- One long strip along a wall, face-nailed and caulked
Layered metal as the defense
- New step flashing, one piece per shingle course
- Counterflashing set into the mortar joints
- New pipe boots and skylight kits with every roof
- Siding lapped over the flashing, with a kickout at the eave
Sealant isn’t useless. It has a small role at exposed nail heads and terminations. But sun and Ohio freeze-thaw cycles dry it out, shrink it, and crack it, often long before the shingles around it wear out. When a bead of caulk is the only thing between rain and your attic, the #1 roof flashing mistake has already been made, and the leak is already scheduled.
Find Every Piece of Flashing on Your Roof
Tap a number on the roof, or pick from the list, to see what that roof flashing does, what proper work looks like, and the red flag that signals the #1 roof flashing mistake.
Simplified roof plan. Real roofs combine these details in different ways.
Chimney
A chimney gets two layers of roof flashing: step flashing woven into the shingles, and counterflashing cut into the mortar joints and folded down over it. Wide chimneys also need a cricket, a small peaked roof behind the chimney that splits water around it.
Red flag: Counterflashing glued to the face of the brick with sealant instead of set into the mortar, or a wide chimney with no cricket. The model residential code calls for a cricket on chimneys more than 30 inches wide.
Sidewall
Where a roof runs up beside a wall, each shingle course gets its own L-shaped piece of step flashing, overlapping like the shingles themselves. Code calls for at least 4 inches up the wall and 4 inches onto the roof, with siding lapped over the vertical leg.
Red flag: One long continuous strip, face-nailed and caulked. When that bead dries and cracks, water runs straight behind it. This is the #1 roof flashing mistake in its most common form.
Eave at a wall
A kickout is a small angled piece at the bottom of a roof-to-wall run. It turns the water that has been running down the step flashing out into the gutter instead of into the wall.
Red flag: No kickout at all, a close cousin of the #1 roof flashing mistake. Water pours behind the siding, and vinyl, brick, and fiber cement can hide the rot for years.
Valley
Valleys carry more water than any other part of the roof. They need ice and water underlayment beneath, then either a metal liner or shingles cut in a straight line along the centerline.
Red flag: Nails driven too close to the center, or a valley that collects leaves and holds water against the joint.
Plumbing vent
Vent pipes are sealed with a boot: a metal or plastic base with a rubber collar that hugs the pipe. The base slides under the shingles above and over the shingles below.
Red flag: A cracked rubber collar smeared with roof cement instead of replaced, or old boots reused during a reroof.
Skylight
Skylights use a flashing kit engineered by the manufacturer for that unit: step pieces at the sides, a head flashing at the top, and an apron at the bottom.
Red flag: Reroofing around an old skylight without replacing its flashing, then counting on sealant to bridge the gap.
The roof-to-wall details are where the #1 roof flashing mistake carries the most risk. The Department of Energy’s Building America program documents how missing step and kickout flashing lets water into wall cavities, where it damages sheathing, framing, and insulation out of sight. For chimneys, GAF explains how a roof cricket works.
Roof Flashing Materials: The Metal Matters
Most residential roof flashing is galvanized steel or aluminum, with copper, zinc, and stainless steel used for longer life or a specific look. Each works when it’s matched to the job, and each can fail early when it isn’t. Mixing metals is a close second to the #1 roof flashing mistake: dissimilar metals in contact, or one draining onto another, can corrode in a few years.

General guidance. Your roofer should match the flashing to the roof, wall, and gutter metals already on the house.

Signs Your Roof Flashing Is Failing
Failed roof flashing rarely announces itself on day one. Settling, wind, temperature swings, and a poor installation let it loosen over time. You don’t need to climb on the roof to spot the #1 roof flashing mistake:
Inside the home
- Ceiling or wall stains near a chimney or wall
- Leaks over garages or porches
- Damp insulation or dark attic decking
- Daylight around vents or pipes
From the ground
- Loose, bent, or missing metal
- Tar or caulk smeared over joints
- Warped shingles near walls
- Stained siding below a roof edge
How to Avoid the #1 Roof Flashing Mistake
The fix happens before the first shingle comes off. Ask every contractor these questions, and get the answers in writing. How they answer tells you whether the #1 roof flashing mistake is coming to your house.
- Will all step flashing be replaced?The answer should be yes, with one piece per course, at least 4 by 4 inches.
- How will the chimney be counterflashed?Look for metal set into the mortar joints, plus a cricket on wide chimneys.
- Are new pipe boots and skylight kits included?Reusing them saves a little now and risks a leak later.
- Where will kickout flashing go?Every spot where an eave meets a wall needs one.
- What underlayment goes in the valleys and eaves?Ice and water barrier belongs in valleys and along the eaves.
- Who warrants the flashing?Shingle warranties cover the product. Flashing is workmanship, so if the #1 roof flashing mistake shows up later, know who stands behind it.
Winter adds its own pressure. Ice dams push water uphill and under shingles, straight into weak flashing at eaves and valleys, which makes the #1 roof flashing mistake even more expensive. Our Ice Dam Prevention Guide covers the ventilation and leak barriers that stop them, and our attic ventilation post explains why the attic matters as much as the roof.

Built on Trust Since 1960
Wilbur Thrush founded Thrush & Son® in 1960, and the third generation leads it today. Across the Miami Valley, we replace roof flashing with every roof, set chimney counterflashing into the mortar, and install kickouts where walls meet eaves. They’re the details nobody sees from the street, the ones that keep the #1 roof flashing mistake off our jobs, and the ones that decide whether a roof stays dry.
Roof Flashing Questions, Answered
What is the #1 roof flashing mistake?
Relying on caulk, roof cement, or reused metal where new, layered flashing belongs. Roof flashing is thin, corrosion-resistant metal installed wherever the roof meets something else: a wall, a chimney, a valley, a vent, or a skylight. Shingles handle the open field of the roof; flashing handles the joints, where most leaks begin.
Should flashing be replaced with a new roof?
In most cases, yes. Step flashing is woven into each shingle course, so it can’t be properly reused once those shingles come off. Pipe boots and skylight kits should be new too. Ask for it in writing.
Can roof cement or caulk fix a flashing leak?
Only as a short-term patch. Sealant dries, shrinks, and cracks in sun and freezing weather, often within a few seasons. Lasting roof flashing work relies on overlapping metal that sheds water by gravity, not glue. Counting on sealant long term is the #1 roof flashing mistake.
How do I know if my leak is flashing or shingles?
Location is the biggest clue. Stains near a chimney, along a wall where a lower roof meets a second story, under a skylight, or around a bath fan or vent pipe point to flashing. Stains in the middle of a ceiling with no penetration above are more likely shingles or decking.
Does my roof warranty cover flashing?
Manufacturer shingle warranties focus on product defects. Flashing is an installation detail, so it usually falls under the contractor’s workmanship warranty or an enhanced system warranty. Read both before you sign.
Got a Stain Near a Chimney or Wall? Let’s Find the Source.
We’ll inspect your roof flashing, check every joint for the #1 roof flashing mistake, photograph what we find, and tell you plainly whether you need a targeted fix or a new roof.
- GAF President’s Club Contractor
- Best of Dayton 2024 Winner · 2025 & 2026 Finalist
- BBB Accredited A+
Michelle, our AI assistant, answers 24/7
Office: Mon–Thu 9–4, Fri 9–2
